
If you’ve been considering upgrading your bathroom, tiling is one of the most impactful changes you can make. A well-tiled bathroom is not only stylish but also durable and easy to maintain. Many homeowners search for how to tile a bathroom, but the truth is—while DIY tiling can be rewarding, professional expertise ensures precision, long-lasting results, and cost savings in the long run.
At First Quality Tiling, we specialise in creating elegant bathroom spaces through expert bathroom tiling solutions tailored to your style and budget.
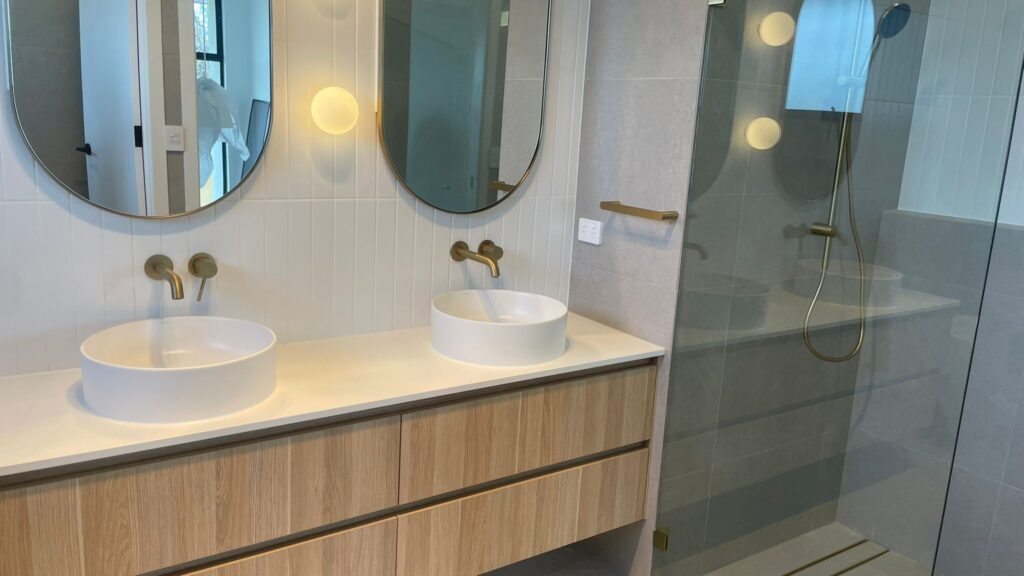
Why Bathroom Tiling Matters
A bathroom is one of the most used spaces in any home. Choosing the right bathroom tile not only enhances beauty but also ensures functionality. High-quality tiling offers:
- Water resistance to protect walls and floors.
- Easy maintenance for a hygienic space.
- Stylish bathroom tile designs that reflect your taste.
- Long-lasting durability with professional installation.
Whether you want a modern spa-like retreat or a timeless classic bathroom, tiles bring both design and practicality together.
Step-by-Step: How to Tile a Bathroom
Here’s a simplified guide for anyone wondering how to tile a bathroom effectively:
1. Plan & Choose Your Design
Select the right bathroom tile designs—from glossy finishes for a luxury look to matte textures for a modern appeal. Consider both aesthetics and slip resistance.
Explore our Tiling Services for expert guidance in choosing the perfect tiles.
2. Prepare the Surface
Walls and floors must be clean, level, and dry. Uneven surfaces can lead to poor adhesion and cracked tiles.
3. Mark Layout & Measure
Plan the tile layout carefully. Symmetry is key in bathroom tiling walls, especially around fixtures like mirrors and sinks.
4. Apply Adhesive & Place Tiles
Using the right adhesive is crucial. Spread it evenly with a notched trowel and place the tiles firmly, using spacers to maintain even gaps.
5. Cut & Fit Tiles
Precision cutting ensures tiles fit around corners, outlets, and bathroom fittings without compromising the design.
6. Grout & Seal
After setting, fill the gaps with grout to lock in tiles and provide a finished look. Seal if needed to protect from moisture.
DIY vs Professional Bathroom Tiling
While guides on how to tile a bathroom make it sound simple, tiling is more complex than it appears. Common DIY challenges include:
- Misaligned bathroom tiling walls
- Using the wrong adhesive or grout
- Uneven tile spacing
- Wasted materials due to mistakes
At First Quality Tiling, our experts ensure precision, flawless finishes, and time efficiency. You don’t just get a tiled bathroom—you get a transformation.
Learn more about our Bathroom Tiling Services for a stress-free experience.
Bathroom Tile Designs: Trends to Consider
Today’s homeowners are moving beyond plain tiles. Popular bathroom tile designs include:
- Subway tiles for a timeless, minimalist look.
- Mosaic tiles for accent walls or shower areas.
- Stone-look tiles for natural luxury.
- Large format tiles to create a seamless modern finish.
For inspiration, you can check the Tile Council of South Australia—a trusted authority in tile standards and design trends.
Why Choose First Quality Tiling?
- Skilled professionals with years of tiling experience.
- Access to high-quality materials and adhesives.
- Personalised designs based on your preferences.
- Affordable, transparent pricing.
We don’t just install tiles—we create bathrooms that combine function, durability, and beauty.
Call to Action
Stop wondering how to tile a bathroom—let the experts handle it for you. At First Quality Tiling, we’ll bring your dream bathroom to life with precision, care, and craftsmanship.
Contact First Quality Tiling today for a free consultation and discover how professional bathroom tiling can transform your space.
Great bathroom tiling guide, I appreciate how it breaks down the process into clear, practical steps—from preparing and waterproofing the surfaces to laying tiles with consistent spacing and finishing with neat grout lines. These kinds of tips are especially helpful for anyone taking on a tiling project, whether DIY or with a pro. Bathroom tiling is all about good prep, careful layout, and attention to detail to ensure a long‑lasting, moisture‑resistant finish.