
When it comes to enhancing your outdoor living space, outdoor wall tiles can transform a plain wall into a stunning feature. Whether you choose sleek ceramic tiles, rustic stone wall tiles outdoor, or decorative cladding, outdoor tiling not only improves aesthetics but also adds durability and protection to your walls. At First Quality Tiling, we specialise in providing professional tiling services that combine style and functionality. In this guide, we’ll walk you through how to install outdoor wall tiles the right way, while also highlighting why hiring experts can save you time, effort, and costly mistakes.
Why Choose Outdoor Wall Tiles?
Outdoor wall tiles are designed to withstand weather, moisture, and temperature changes. Popular choices include:
- Ceramic outdoor wall tiles – Affordable and easy to maintain.
- Porcelain outdoor wall tile – Resistant to water and durable.
- Outdoor wall tiles stone – Perfect for a natural, timeless look.
By selecting the right material, you can create an outdoor space that’s both practical and visually appealing.
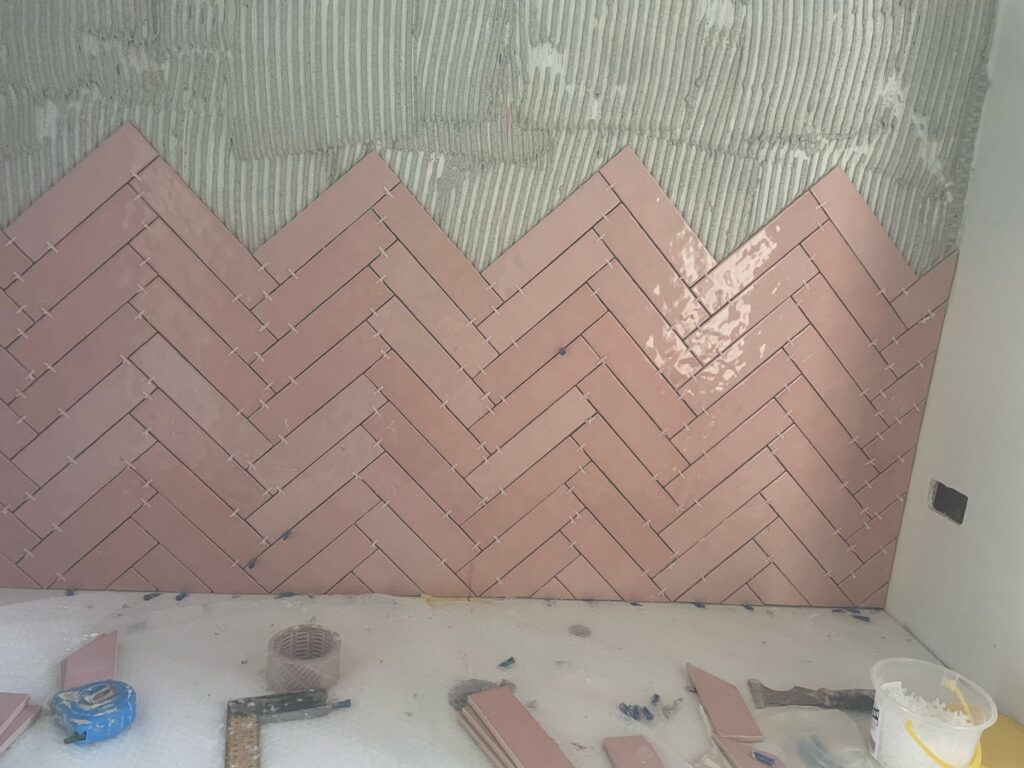
Step-by-Step: How to Install Outdoor Wall Tiles
1. Prepare the Surface
The first step is ensuring the wall surface is clean, dry, and free from dust or debris. If the wall is uneven, apply a render or leveling compound. A solid foundation prevents future issues like loose tiles or cracks.
2. Plan Your Layout
Measure the area and plan your tile layout before applying adhesive. This helps reduce waste and ensures a balanced look, especially around edges. Use a chalk line to guide your first row of tiles.
3. Apply Tile Adhesive
Use a notched trowel to spread outdoor-grade tile adhesive. It’s important to choose an adhesive designed for stone wall tiles outdoor or porcelain to handle exterior conditions. Work in small sections to prevent the adhesive from drying out too quickly.
4. Fix the Tiles
Press the tiles firmly into the adhesive, starting from the bottom and working upwards. Use tile spacers for even gaps. For outdoor wall tiles stone, ensure each piece is level for a natural, stacked-stone effect.
5. Grout the Joints
Once the adhesive has set (usually 24 hours), fill the joints with waterproof grout. Use a rubber float to push the grout into gaps, then wipe away excess with a damp sponge.
6. Seal the Tiles (Optional)
For porous materials like natural stone, apply a sealant to protect against stains and moisture. This step keeps your outdoor wall tile installation looking beautiful for years.
DIY vs. Professional Tiling – What’s Best?
While the process above explains how to install outdoor wall tiles, the reality is that outdoor projects require precision, experience, and the right tools. Mistakes can lead to costly repairs, especially in harsh weather conditions.
That’s where First Quality Tiling comes in. Our expert team ensures flawless installations, whether you’re adding outdoor wall tiles stone for a garden feature wall or ceramic cladding for a patio.
Check out our Wall Tiling Services and Outdoor Tiling Solutions to see how we can help transform your space.
Common Mistakes to Avoid
- Using indoor adhesive instead of outdoor-rated adhesive.
- Skipping surface preparation, leading to uneven tiles.
- Forgetting expansion joints, causing tiles to crack.
- Not sealing stone tiles, leaving them vulnerable to moisture damage.
Avoid these pitfalls by working with professionals who know the ins and outs of outdoor installations.
Final Thoughts
Learning how to install outdoor wall tiles is valuable for homeowners who love DIY, but professional installation guarantees lasting results. Whether you’re upgrading your garden walls, patio, or outdoor entertainment area, choosing quality tiles and skilled workmanship makes all the difference.
At First Quality Tiling, we pride ourselves on delivering high-end tiling solutions tailored to your needs. From stone wall tiles outdoor to modern porcelain finishes, our team ensures your project stands the test of time.
Call to Action
Ready to upgrade your outdoor space? Contact First Quality Tiling today for a free consultation and let us help you create a stylish, durable outdoor feature wall.
Get a Quote Now
For inspiration and professional tile installation tips, you can also explore resources like Australian Tile Council for expert industry standards.
Great post — a clear, simple guide that highlights the essentials of installing outdoor wall tiles, from proper prep to durable finishing.